Difference between revisions of "Installation JRiver Media Center"
m (1 revision) |
m (1 revision) |
(No difference)
| |
Latest revision as of 11:24, 13 January 2021
Click here for a video tutorial showing the installation steps for the JRiver Media Center plugin and configuration.
Steps
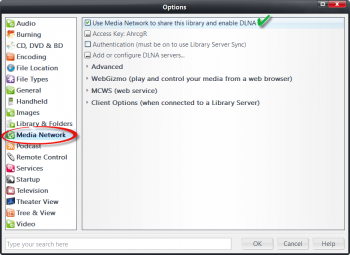
- In JRiver Media Center enable the web API under Tools >> Options >> Media Network.
- Check the option: "Use Media Network to share this library and enable DLNA" (see image to the right).
- Optionally enable authentication and choose a username and password (you will need to enter these in the VC JRiver plugin settings).
- In VoxCommando, start by following the general steps for Installation.
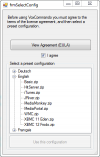
- During installation you will be asked to choose a standard configuration. At this point choose JRiver.

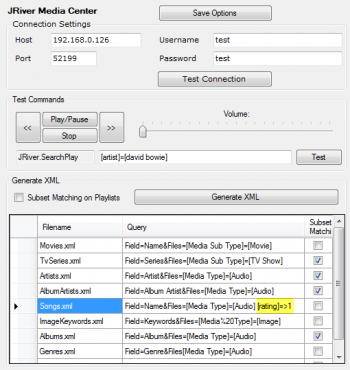
- Adjust plugin settings if necessary. (Default settings are usually fine.)
- If VoxCommando and JRiver are both running on the same computer, then the Host field can be left as "localhost".
- Otherwise (if JRiver is on another system from VC) the Host Field should be changed to the local IP address of the system JRiver is on. For example 192.168.1.102
- If you have enabled authentication in JRiver settings then you should enter the appropriate username and password.
- In most cases you can leave the default port setting of 52199.
- Scan your JRiver media library (GenXML). If you are not yet familiar with VoxCommando, the video tutorial demonstrates how this is done and introduces the plugin settings (this is for an older version of the plugin, so there are some minor differences; you now have more control over how your media is scanned).
- You can generate XML files:
- Using the "Generate Payload XML Files" button in the JRiver plugin settings page.
- New users are advised to leave the default settings as they are for at least the first scan. If you run into problems scanning your media library, see this thread for more information on customizing how your media library is scanned. This discussion will be particularly useful if you have an extremely large collection (30,000+ song titles).
- From the main VC window using GenXML >> JRiver
- Using the Action JRiver.Generate.All
To install the standard JRiver configuration with preset commands as seen in this demonstration video, you should install VoxCommando version 1.183 or greater.
To see a list of the pre-configured JRiver commands, click on Help > Build Voice Menu in VoxCommando's main menu.
As always, you can modify these commands to suit your own phrasing preferences and build your own commands from scratch as well.

